Setting up SSO with Azure AD
Single Sign-On (SSO) is only available for Workspaces on Enterprise Plan. Reach out to support@devraven.io for upgrading your Workspace to Enterprise Plan.
This guide walks you through the setup process for enabling Single Sign-On (SSO) for your Workspace with Microsoft Azure Active Directory (Azure AD). Once the SSO is configured for your Workspace, users will be redirected to your configured Azure AD identity provider to complete the login and upon successful login they will be able to access the Workspace.
We support SSO login to DevRaven using OAuth/OpenID Connect (OIDC).
Setup Instructions
In DevRaven
- Login to your DevRaven Workspace as a Admin User.
- Navigate to Settings page from left nav.
- Click Single Sign-On tab on the page.
- A SSO Configuration page will be displayed.
- Copy the OAuth Redirect URI shown for your Workspace. This URL will be used for configuration in Azure Portal below.
In Azure Portal
Create App Registration
- Login to https://portal.azure.com
- In the top search menu, search for App registrations.
- Click App registrations from the list shown.
- Click New registration button on the page.
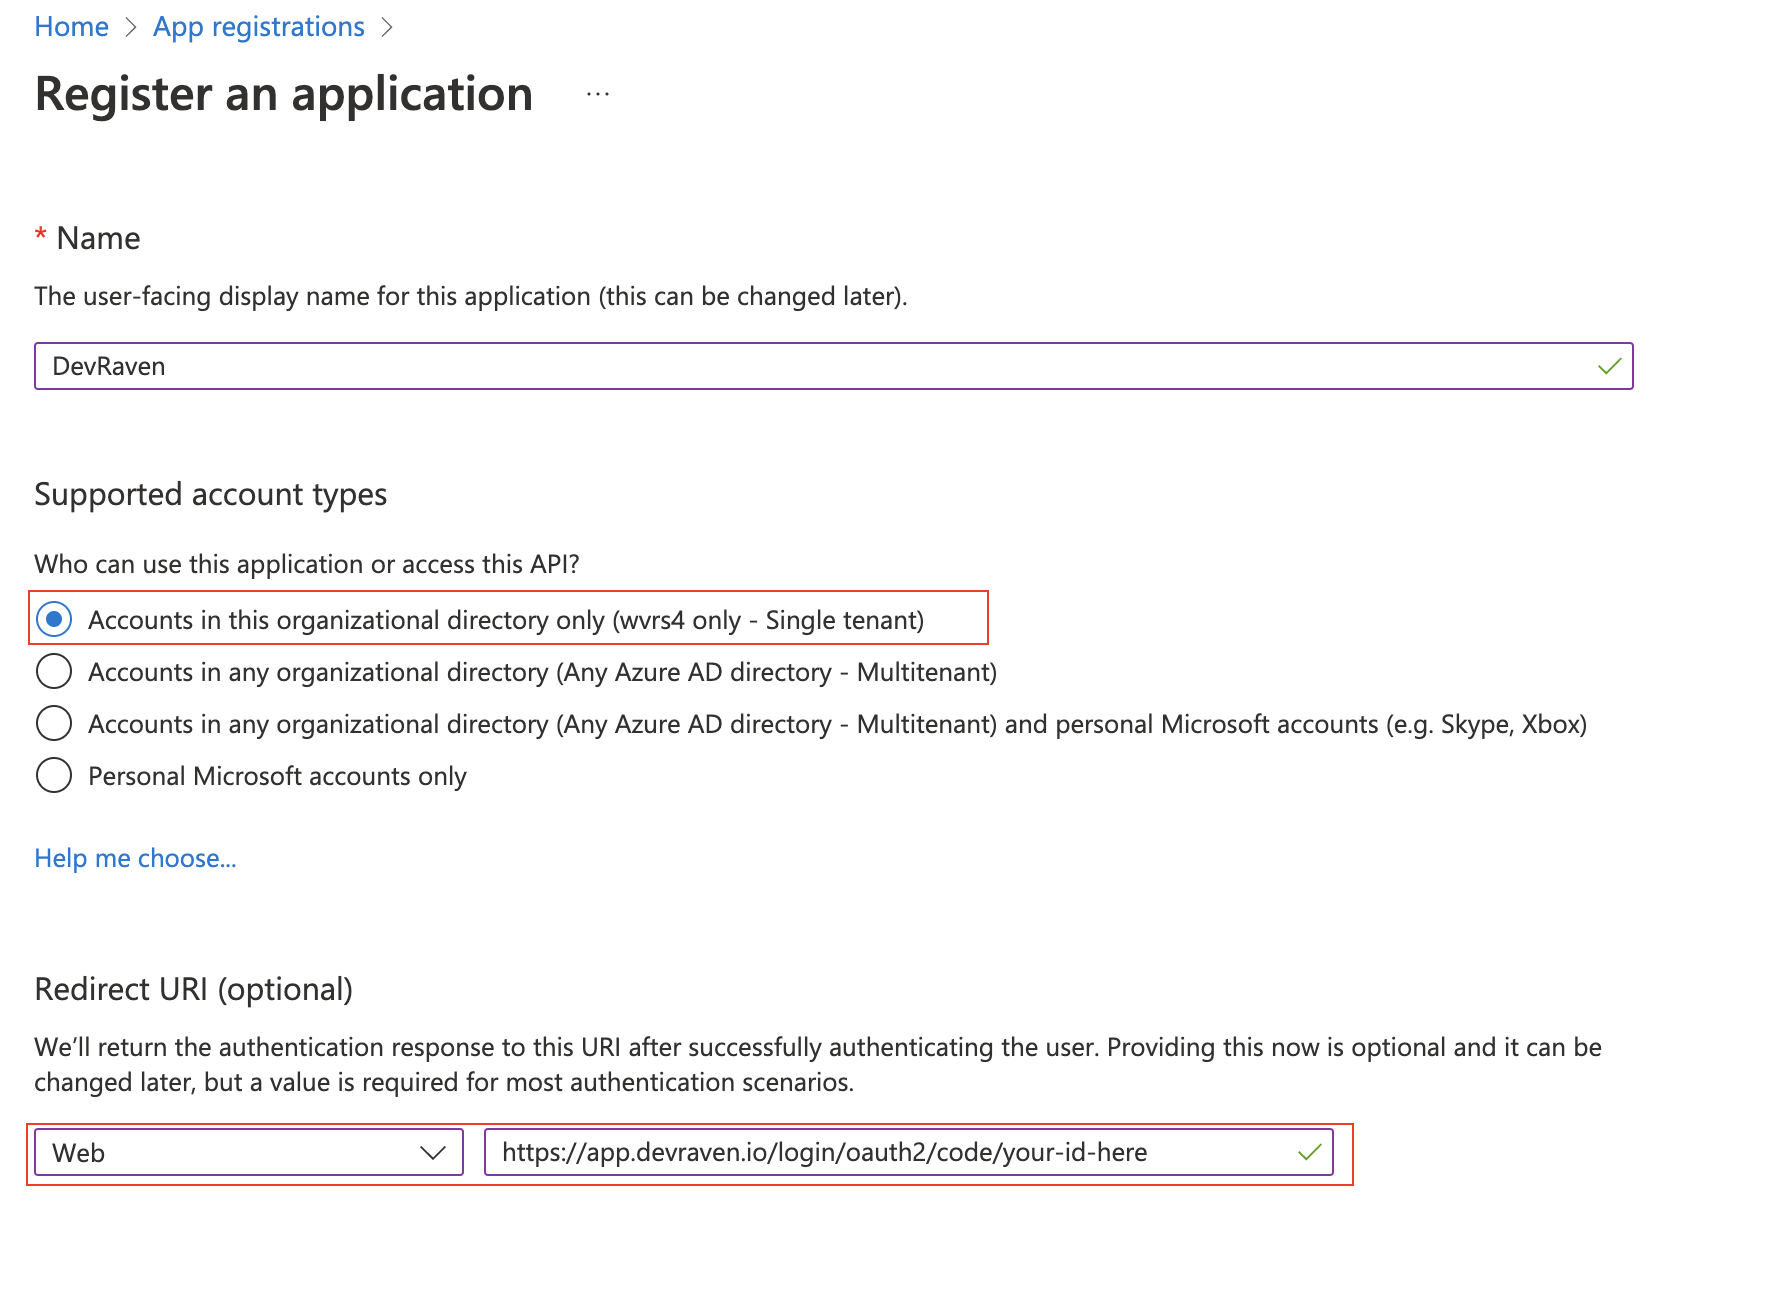
- Provide a name for the application. E.g. DevRaven - App Team Workspace
- Select Accounts in this organizational directory only
- Under Redirect URI, Select Web from the Select a Platform dropdown
- Paste the copied OAuth Redirect URI as the Redirect URI.
 9. Click Register
10. A new App registration will be created.
9. Click Register
10. A new App registration will be created.
Configuring Authentication Properties
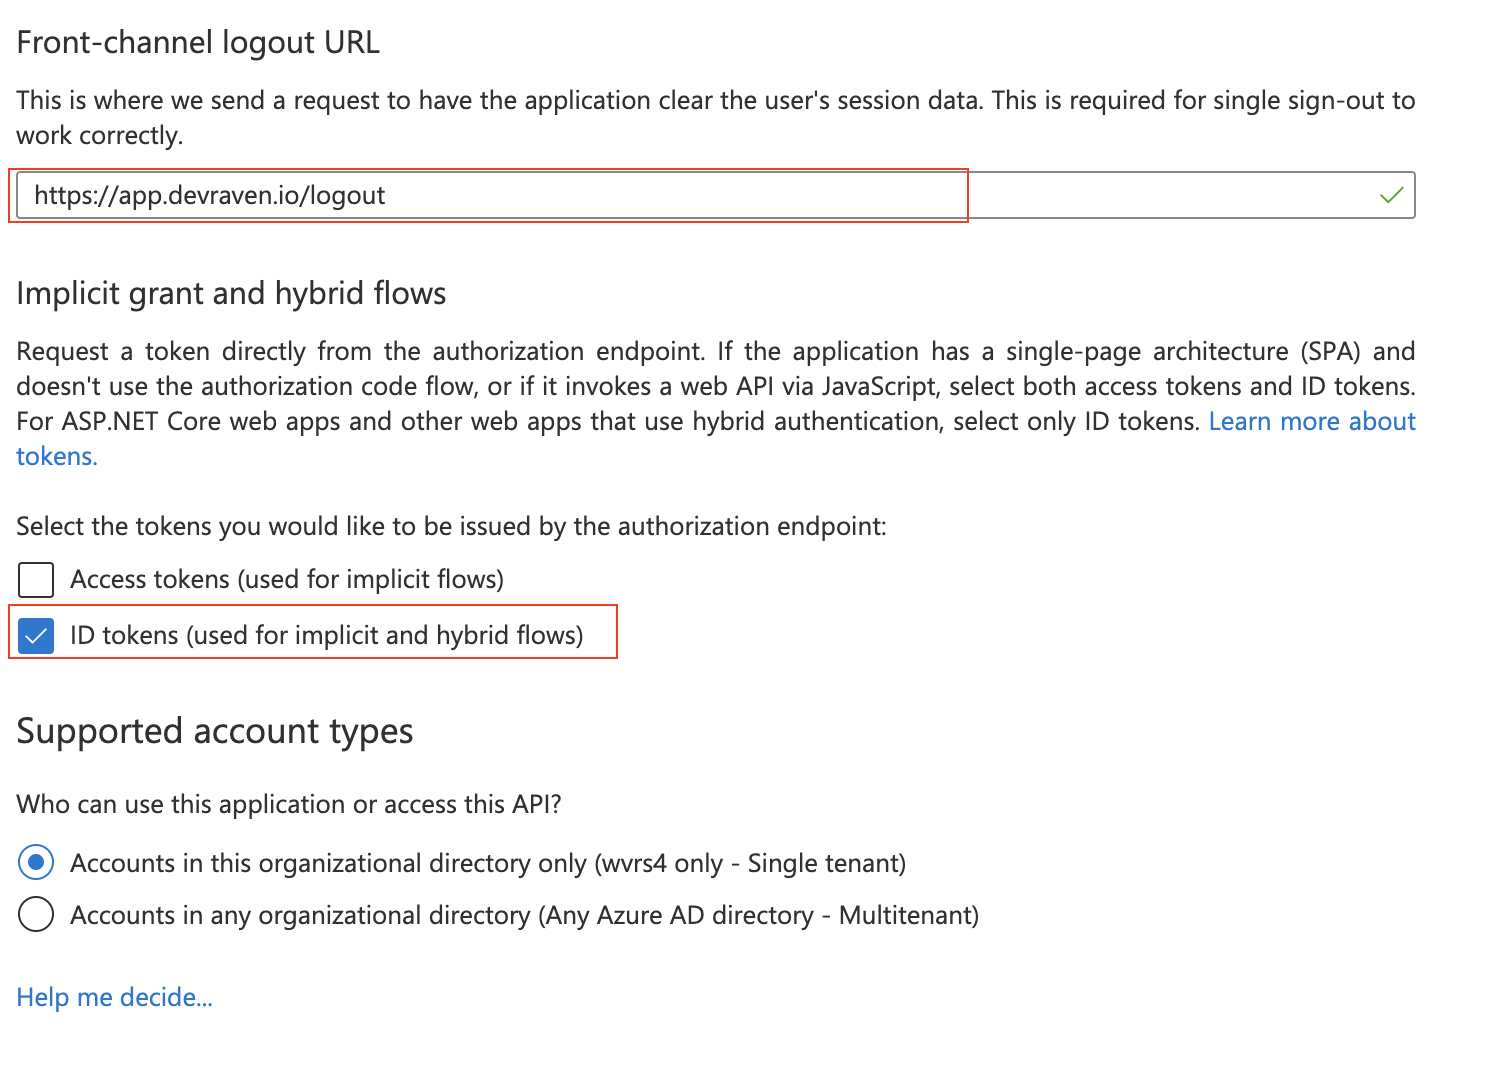
- Click Authentication in the left nav menu.
- Provide https://app.devraven.io/logout as Front-channel logout URL.
- Select ID tokens (used for implicit and hybrid flows) under Implicit grant and hybrid flows section.
- Click Save
Configuring Permissions
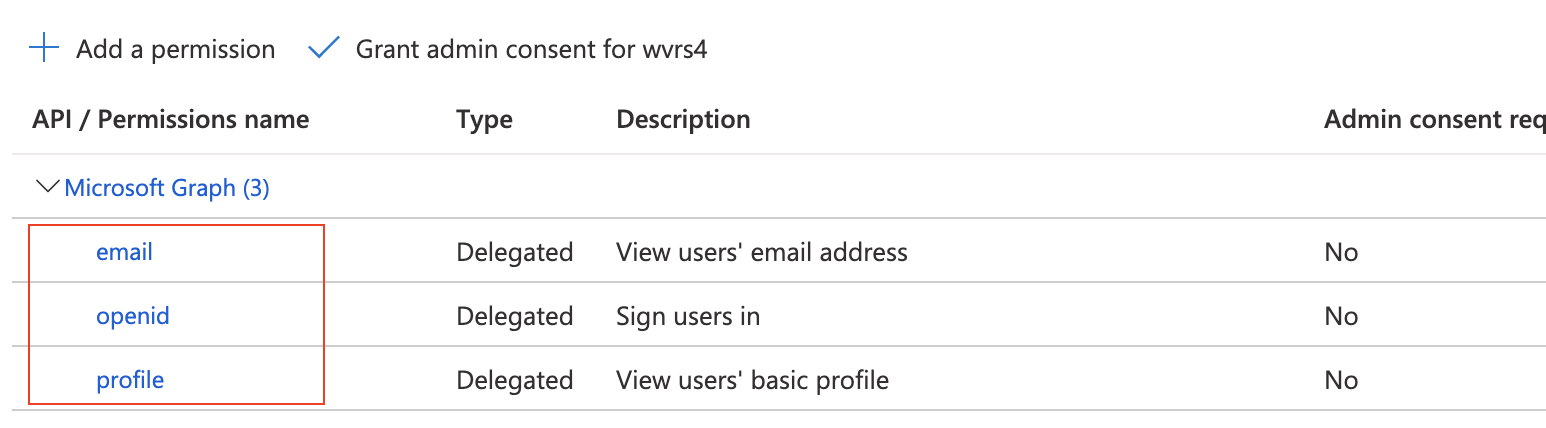
- Click API Permissions from the left nav menu.
- Remove User.Read permission if it's already available in the list of API/Permissions names.
- Click Add a permission button.
- A new fly-in page will be displayed. Click Microsoft Graph tile.
- Click Delegated permissions tile.
- Select Openid, email, profile from the list of permissions.
- Click Add permissions
Creating a Client Secret.
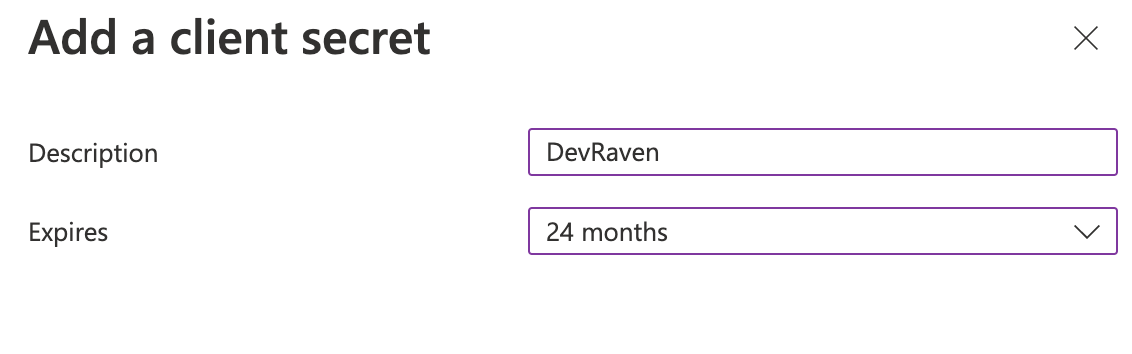
- Click Certificates & secrets from the left nav menu.
- Click New client secret button.
- Provide a name for the secret and select an appropriate Expires interval. Note that, you must generate a new client secret and update your SSO configuration in DevRaven before the expiry of this secret.
- Copy the generated Value of the client secret for use below.
- Click Overview from the left navigation menu.
- Copy Application (client) ID value for use below.
- Click Endpoints button.
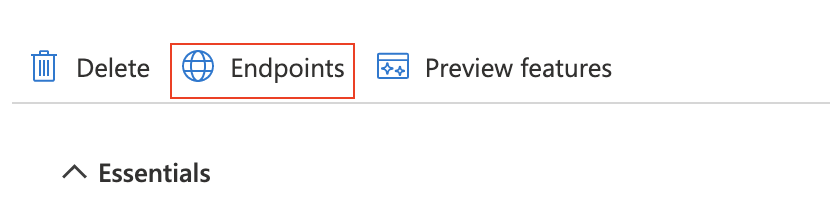
- A fly-in page will be displayed.
- Copy the url for OpenID Connect metadata document. This url ends with /.well-known/openid-configuration
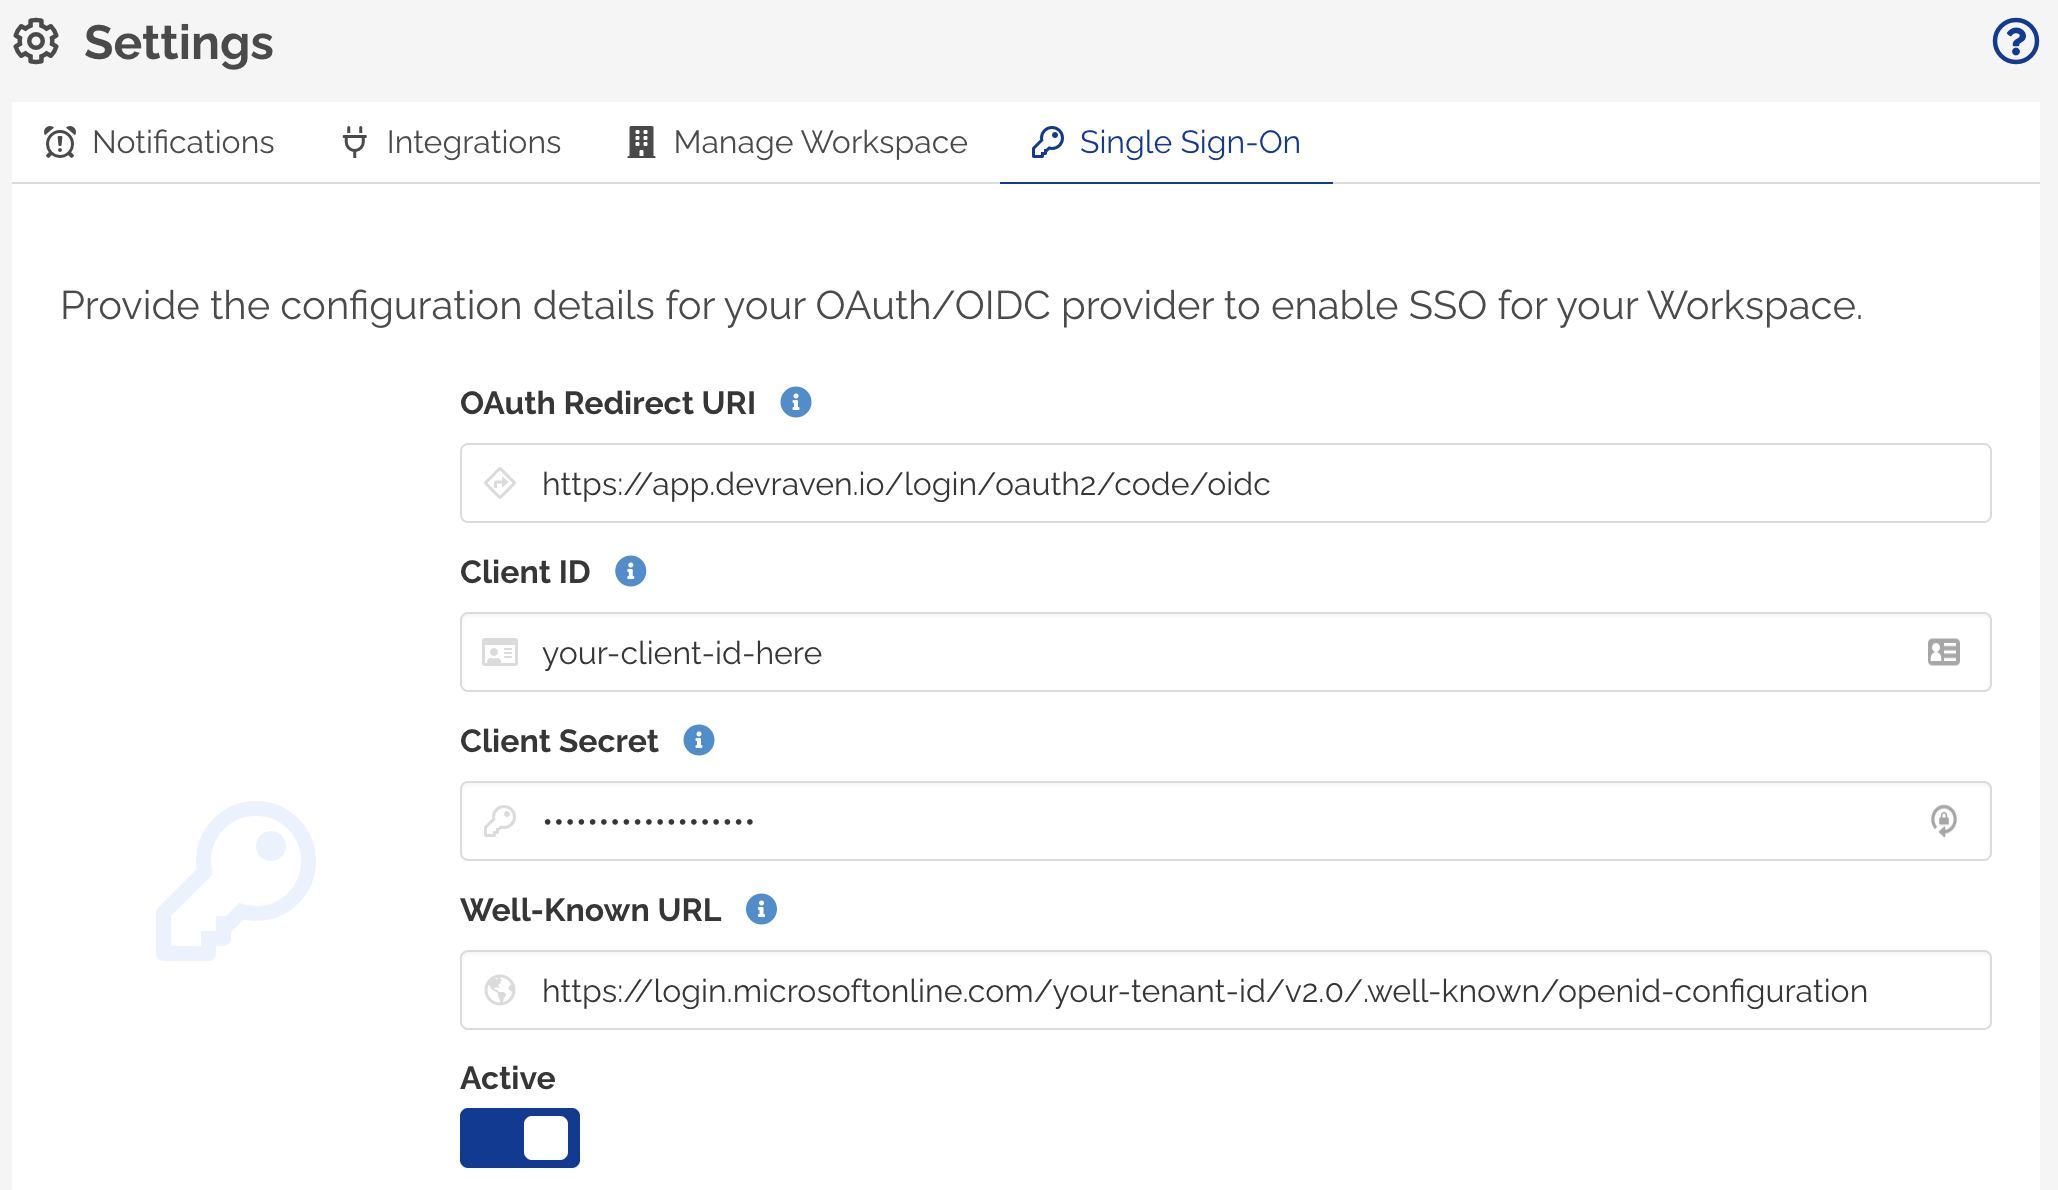
Back in DevRaven
- Login to your DevRaven Workspace as a Admin User.
- Navigate to Settings page from left nav.
- Click Single Sign-On tab on the page.
- A SSO Configuration page will be displayed.
- Provide the Client ID copied above from Azure Portal.
- Provide the Client Secret copied from Azure Portal.
- Provide the Well-Known URL copied from Azure Portal.
- Toggle Active to ON.
- Leave Allow login with SSO only to OFF for now until your testing is complete. Then change this setting to ON.
- Click Save Changes
The SSO configuration is now complete. You can now logout and try logging using your SSO credentails.
Once you confirm that the login is successful, remember to update the SSO configuration to set Allow login with SSO only to ON to disable Password-based and Google authentication to your Workspace.
If Allow login with SSO only property is not enabled for your SSO configuration, Workspace users would still be able to access the Workspace using username/password or can login via Google. Ensure that you toggle Allow login with SSO only to ON to restrict other login types for your Workspace